Create or Import a BOM with Failure Rates
Transition physical components into EPBS configuration items, create or import a Bill of Materials (BOM), maintain its failure rates, and allocate functions.
Enable the PC-to-CI transition
This transition is disabled by default.
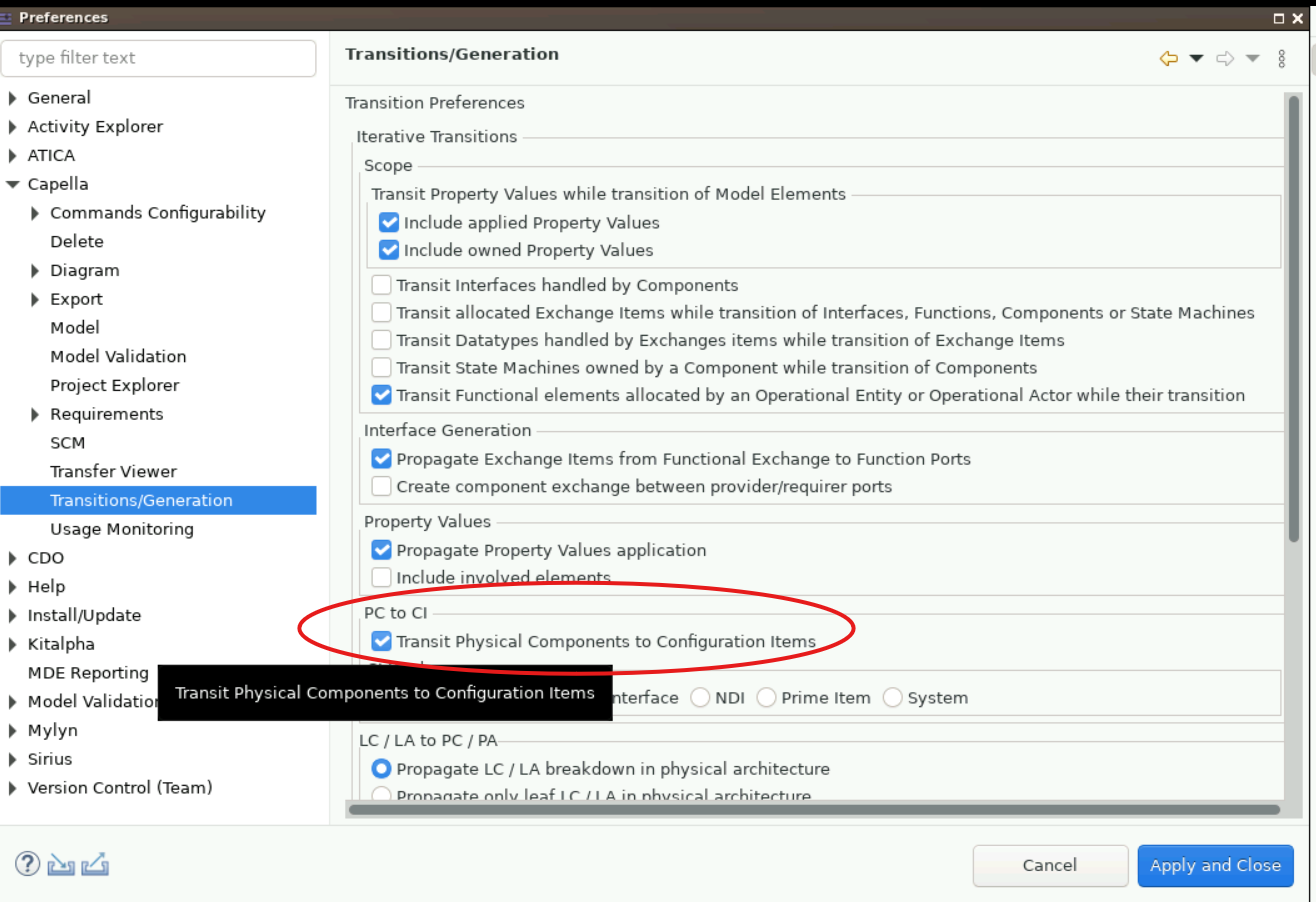
- Select Window > Preferences > Capella > Transitions/Generation.
- Under PC to CI, enable Transit Physical Components to Configuration Items.
Transition physical components to configuration items
- Open Physical Architecture > Structure.
- Select the physical components to propagate to EPBS.
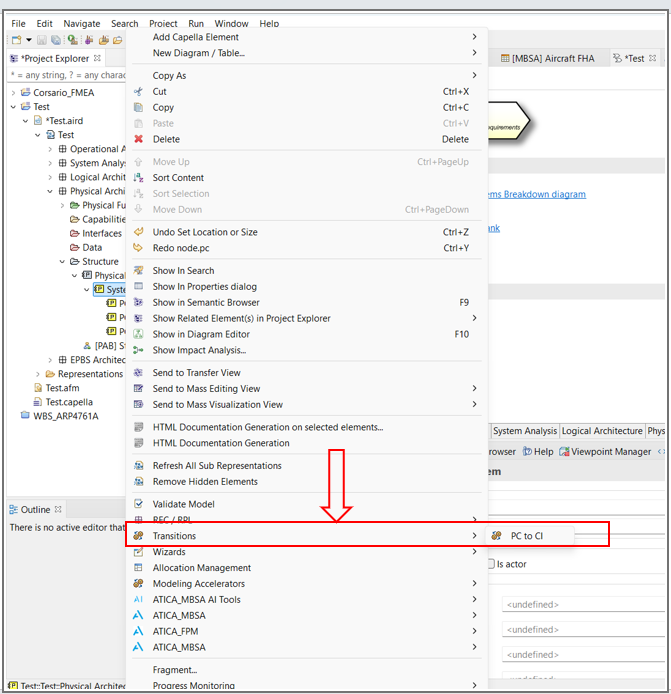
- Right-click and select Transitions > PC to CI.
- In PC to CI Transition, review the selected elements and select Apply.
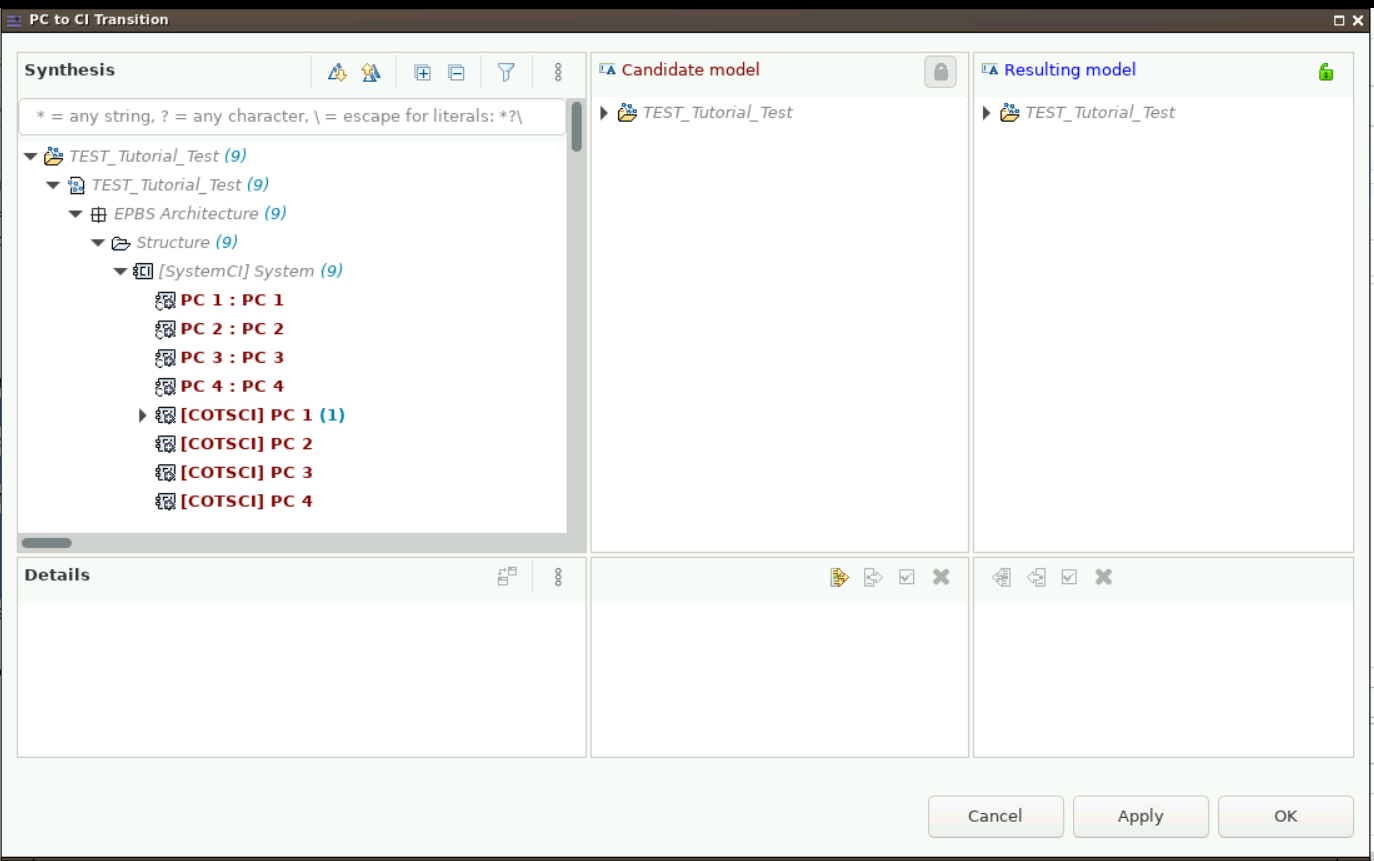
- Confirm that the resulting configuration items appear under EPBS Architecture.
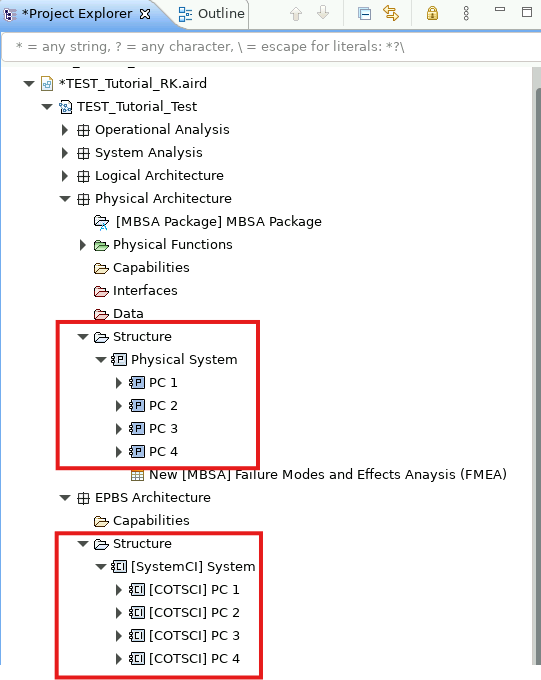
Add a configuration item manually
- Right-click the parent element.
- Select Add Capella Element > Configuration Item.
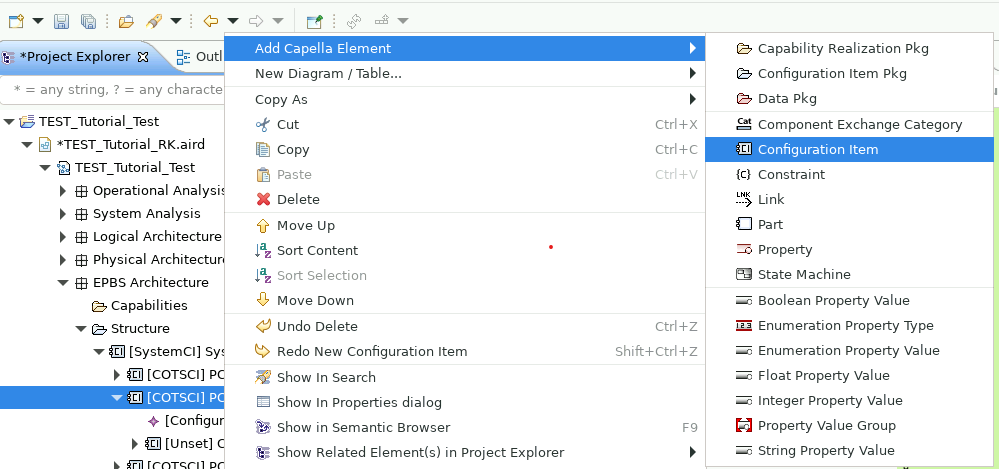
- Double-click the new configuration item.
- Set its name, summary, configuration-item kind, and other required properties.
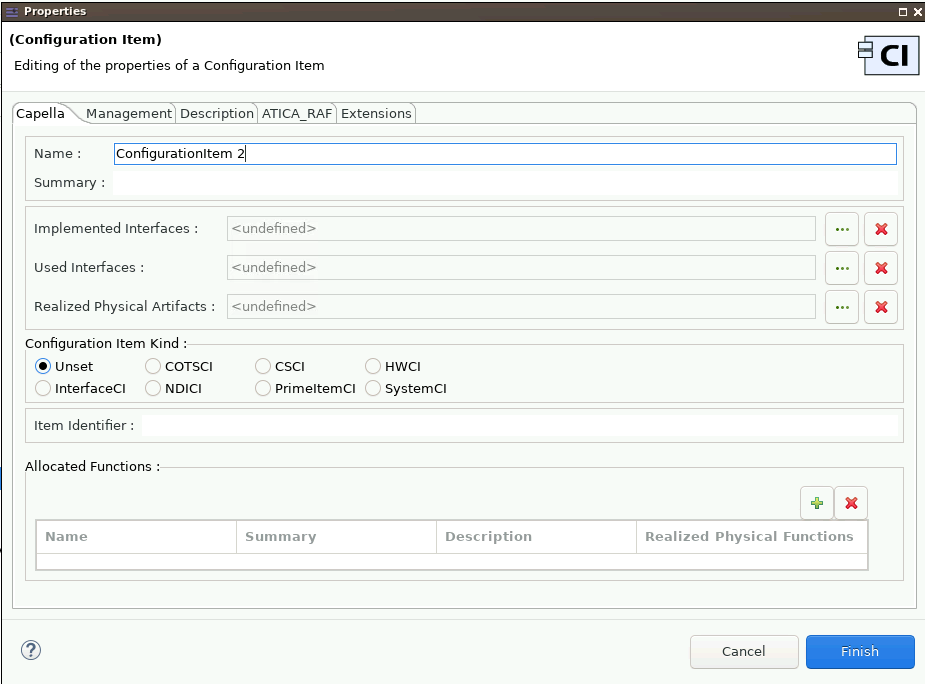
Create a bill of materials
- Right-click the item.
- Select New Diagram/Table... > [RAF] Bill of Materials.
- To add an item in the table, right-click the top item and select Create Configuration Item.
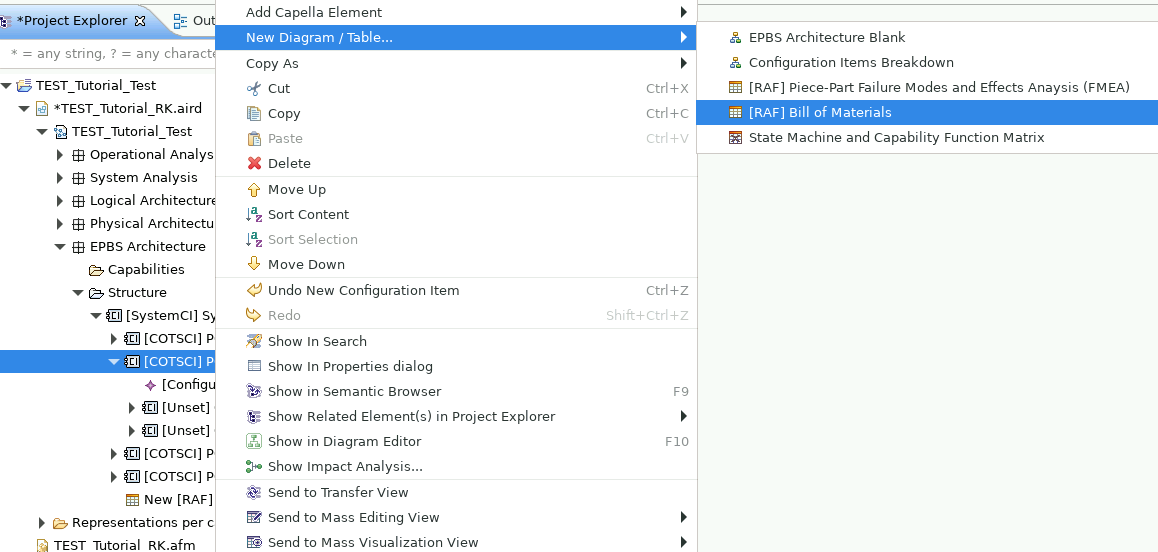
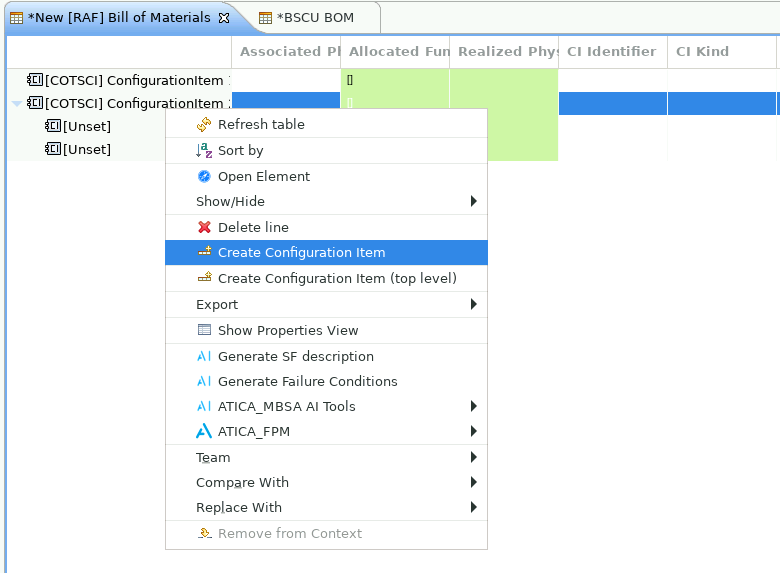
Import a bill of materials
The alternative to building the BOM manually is to import an Excel sheet.
Before importing, use Viewpoint Manager to reference ATICA_MBSA and then ATICA_RAF. The Reliability viewpoint, ATICA_RAF, is required for the Excel import command.
- Under EPBS > Structure, right-click the item.
- Select ATICA_RAF > Import Bill of Materials.
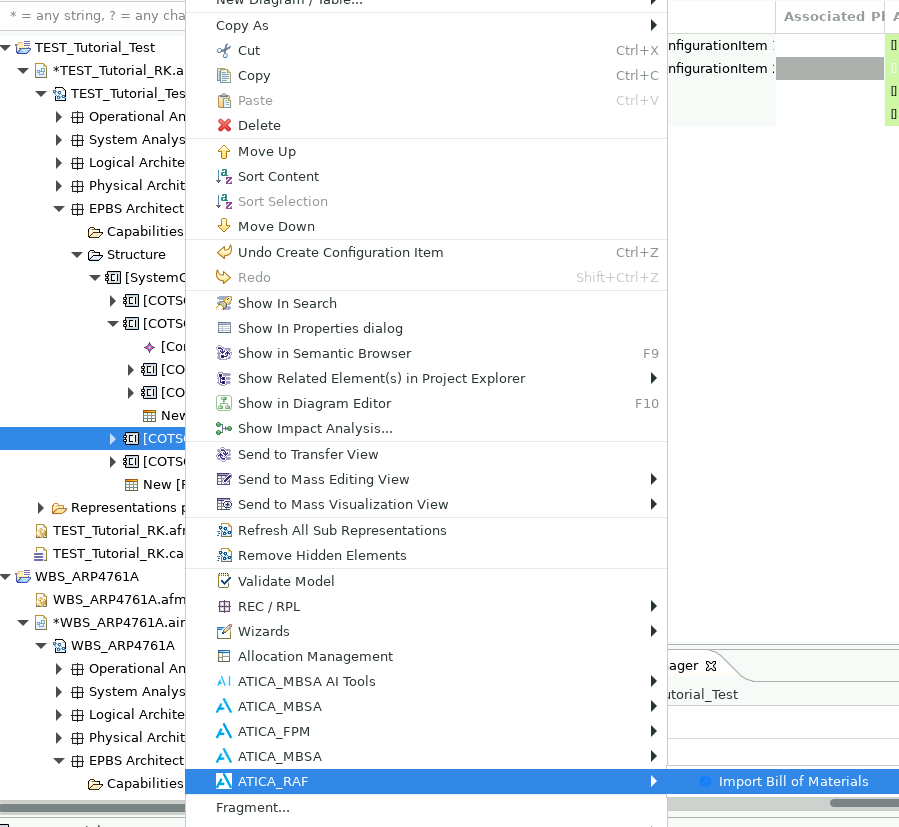
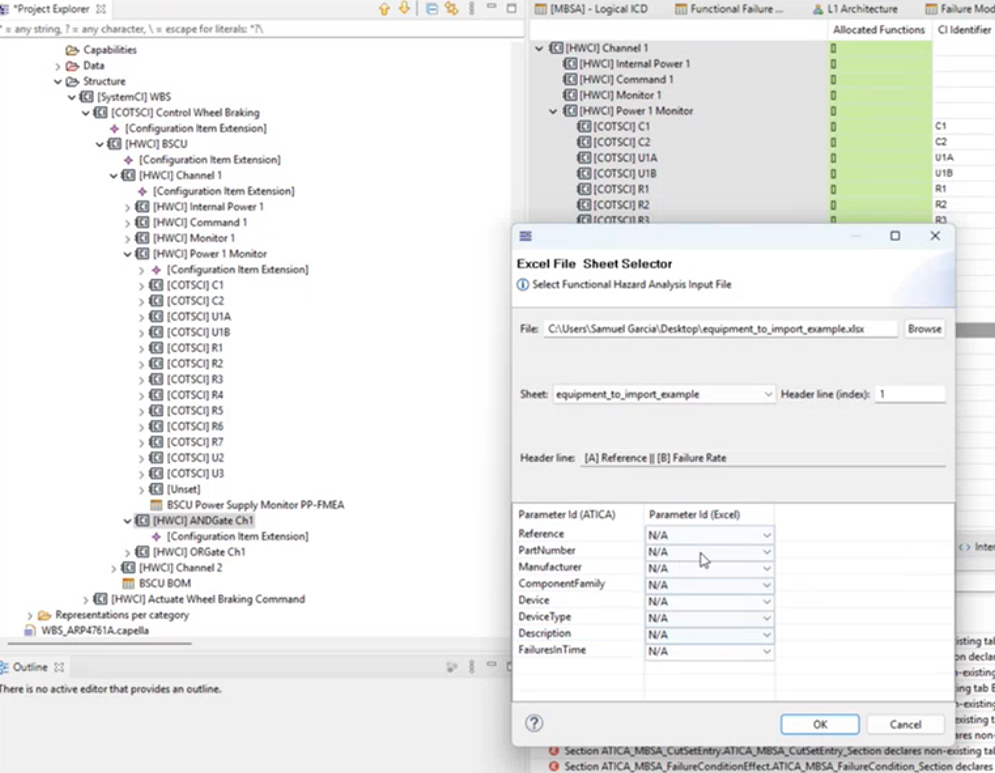
- Select the Excel file and sheet.
- Set the header line, normally
1. - Map the Excel columns to the ATICA fields.
- Confirm the import.
Note
A BOM can be imported for only one item at a time. In the import mapping, Failures in Time means failure rate.
Repeat the import to add parameters or update the BOM. Part data can also be entered manually:
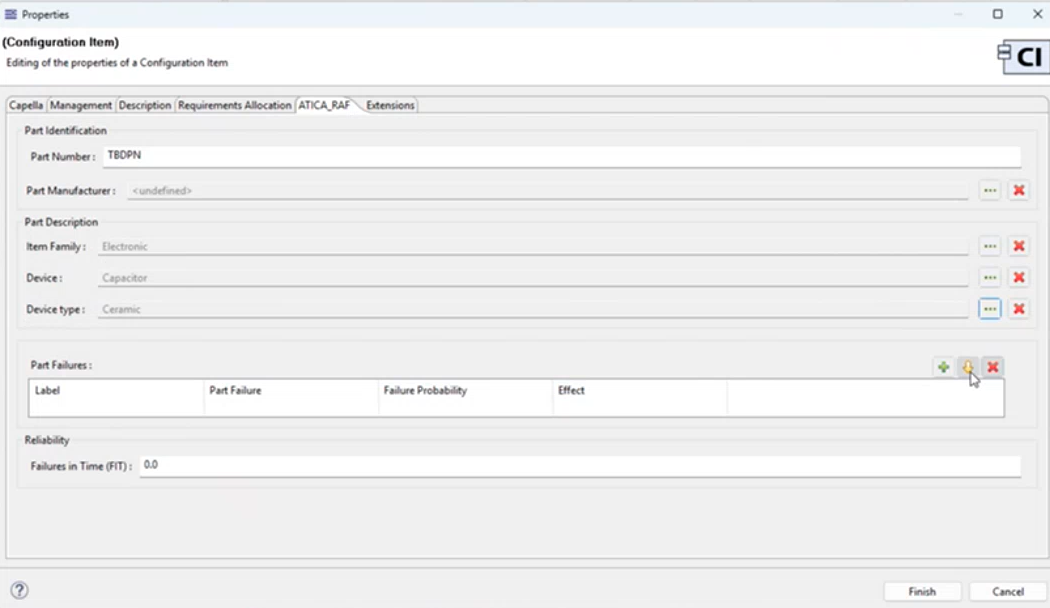
- Double-click an item in the BOM table.
- On the Capella tab, edit fields such as Name and CI Kind.
- On the ATICA_RAF tab, edit Part number, Part Manufacturer, Part Description, and Failure Rate in failures per hour.
- Expand Part Failures with the yellow arrow to inspect the failure distribution.
Note
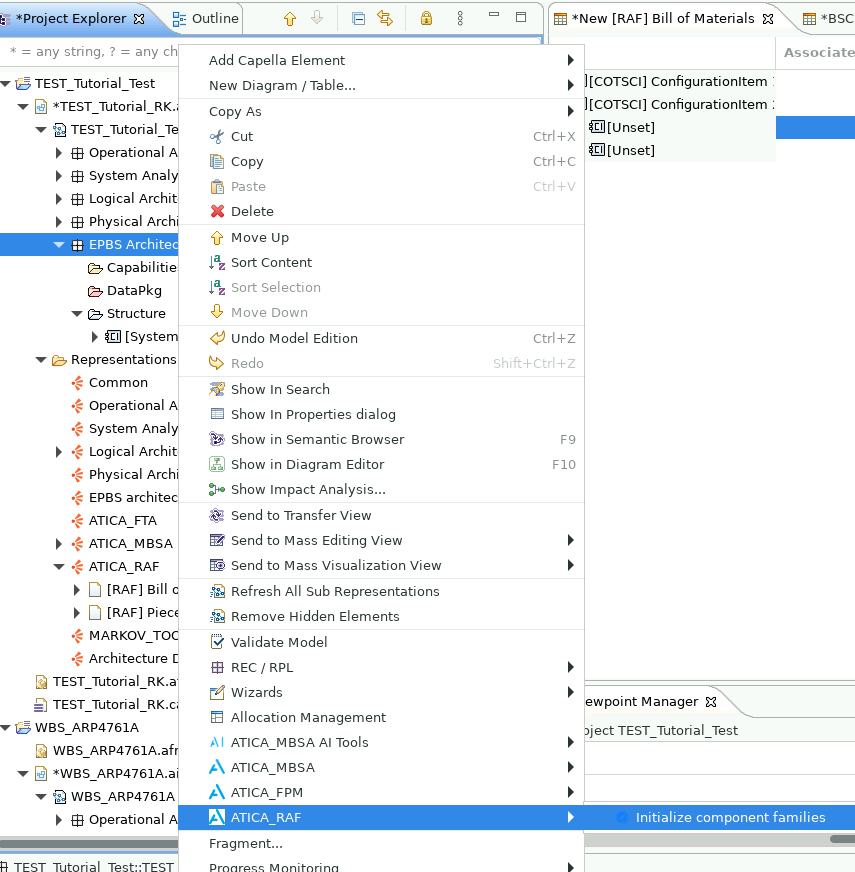
Before editing Part Description, right-click EPBS Architecture and select ATICA_RAF > Initialise Component Families.
Allocate functions to a configuration item
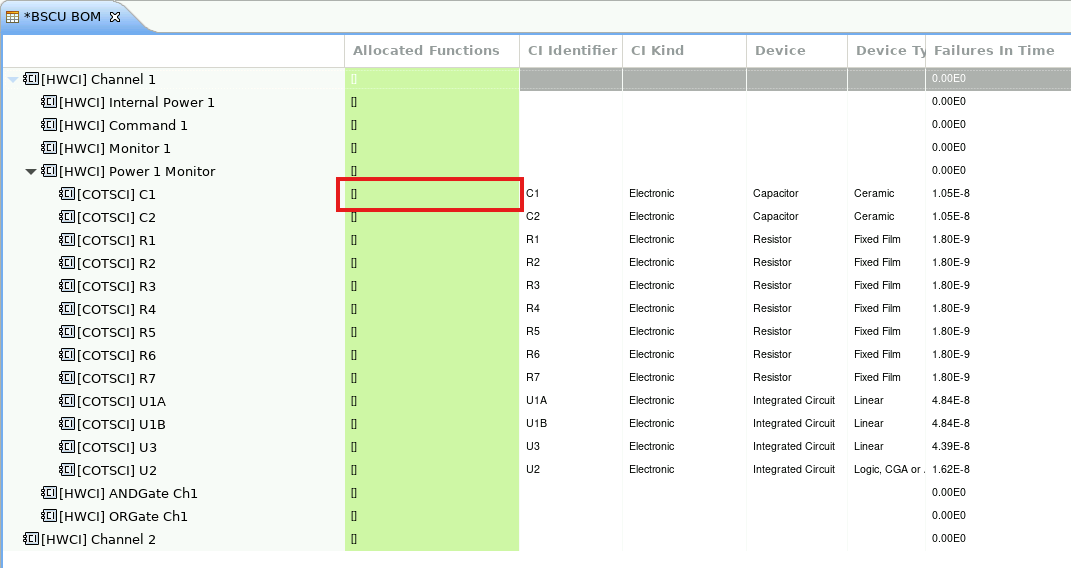
- In the BOM table, double-click the item's Allocated Functions cell.
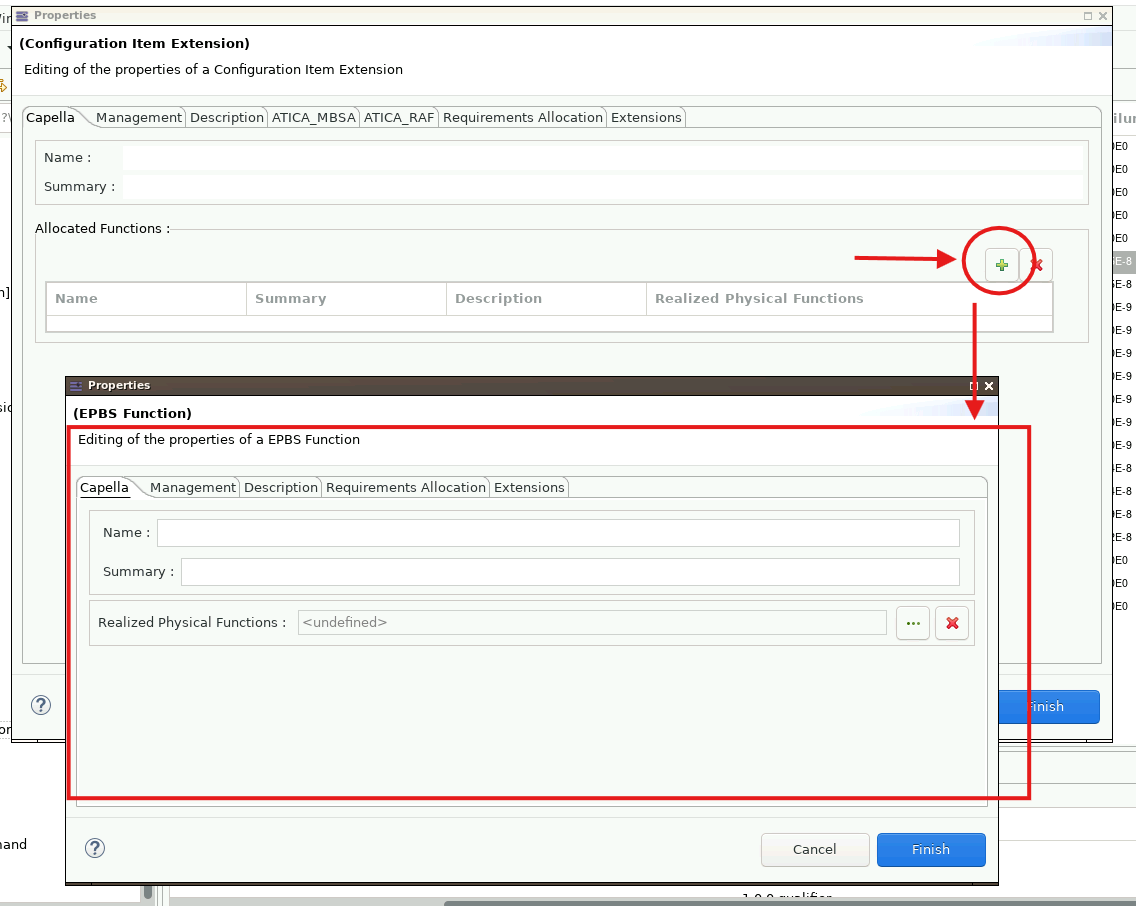
- Under Allocated Function, select +.
- Edit the EPBS function's properties.
- To trace it to a Physical Architecture function, use the three-dot button under Realised Physical Functions and select the function.